
Online contact forms are a crucial way for people to reach out to your business. Using a contact form on your website, current and potential customers can ask for help, give valuable feedback, and even request a demo.
The problem with many contact forms is that their responses are typically routed to an email inbox. There, customer queries get buried by a mountain of other emails. Or else, they are forwarded to other team members, and it’s unclear if the customer ever receives a response. The emails that are responded to often become long email chains that are difficult to organize or search through.
That is why AirSend gives you with the ability to create a contact form on your website that is connected to your AirSend account. When someone submits a query using the form, AirSend creates a channel for you and the person where you can easily chat and share files.
Below is a more detailed explanation of AirSend’s online contact forms.
How AirSend’s Online Contact Forms Work
What the Contact Form Looks Like In Your Website
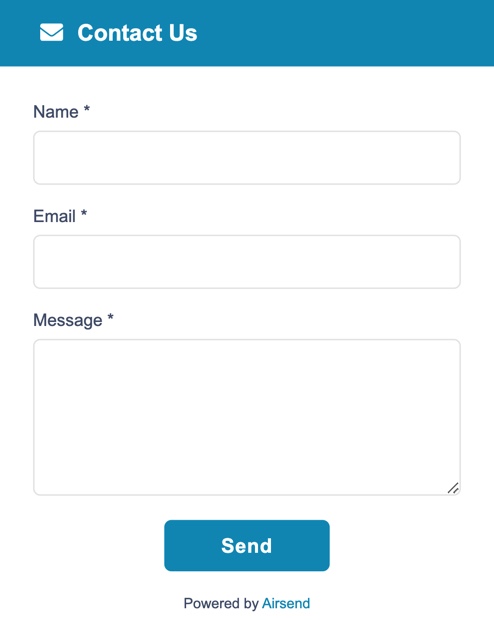
There are customizable elements, but here is a basic preview of what an AirSend contact form looks like on a website.
Contact Us Button
There will be a “Contact Us” button at the bottom right corner of the web page.
Contact Form
When someone clicks on the button, an online contact form like the one below will pop up.
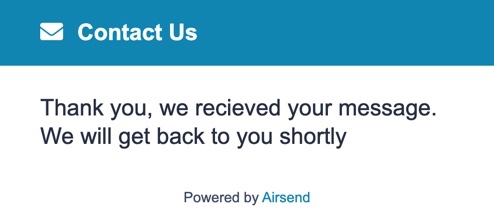
What Happens After a Contact Form Submission
Submission Message
After the person clicks “Send,” a submission message will appear.
AirSend Connection
Then, a few things will happen:
- A Channel will be created in your AirSend account that includes you and the person who submitted the form.
- You will also receive an email letting you know that someone completed a contact form and that a new Channel has been made.
- An email will be sent to the person who submitted the form letting them know that the Channel has been created. They will need an AirSend account to chat directly in the Channel. If they do not have one, the person can send email messages into the Channel and receive your Channel messages by email as well.
How to Add a Contact Form to Your Website
Now that you know how it works, here is a step-by-step tutorial on how you can add a contact form to your website today.
Step 1: Go to Settings
In the upper-right corner of the AirSend screen, click on your username and choose Settings.
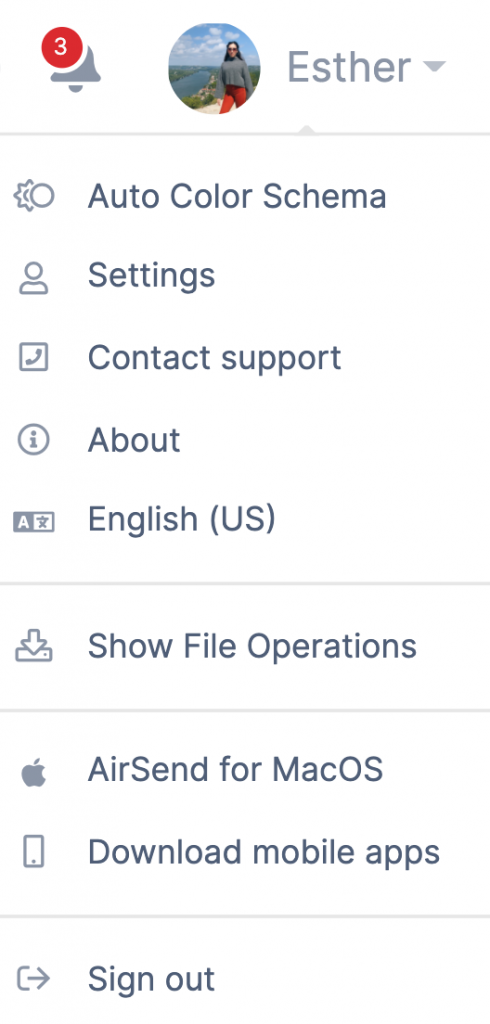
Step 2: Go to the Contact Form Tab
Click the Contact Form tab in the Settings window. There, you will see the script, theme color, and submission message sections.
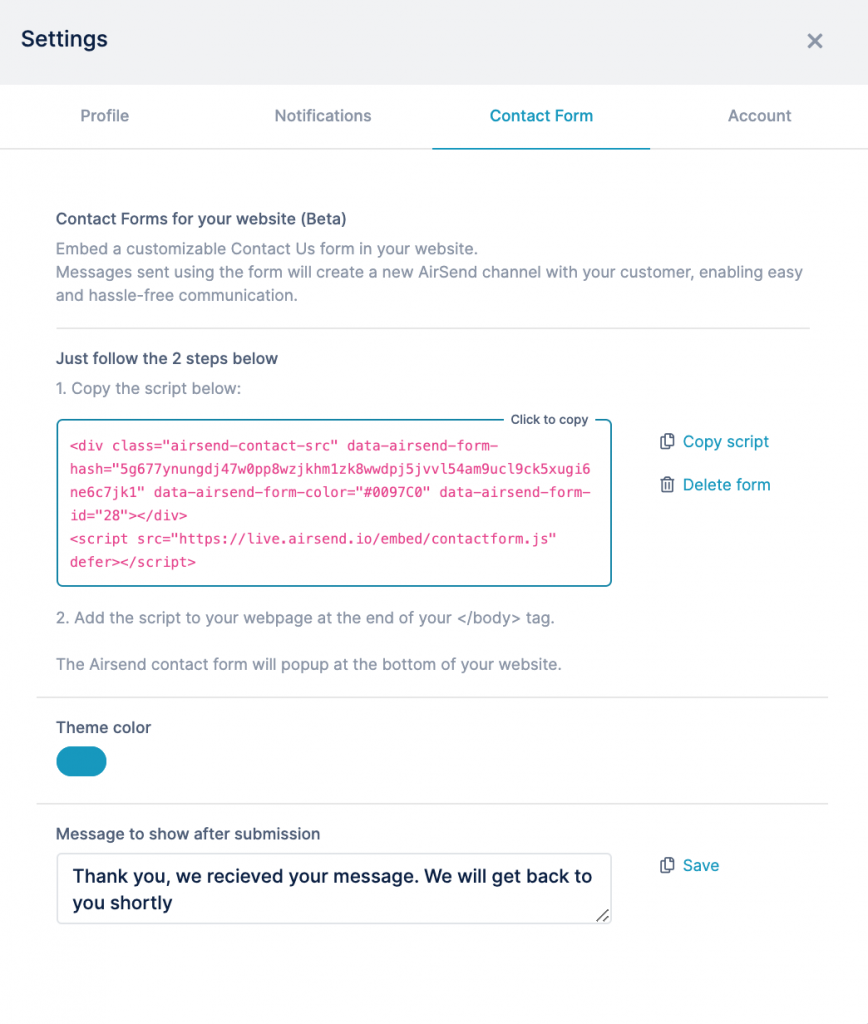
Changing Your Form Color
If you want the “Contact Us” button and form to appear in a different color than the default blue, click Theme Color to change it.
Changing Your Submission Message
To display a different message on the website after the user clicks send, edit the text in Message to Show After Submission.
Step 3: Save and Copy
If you have made any changes to the theme color or submission message, click Save. After that, click Copy Script to copy the script that inserts the form into a web page.
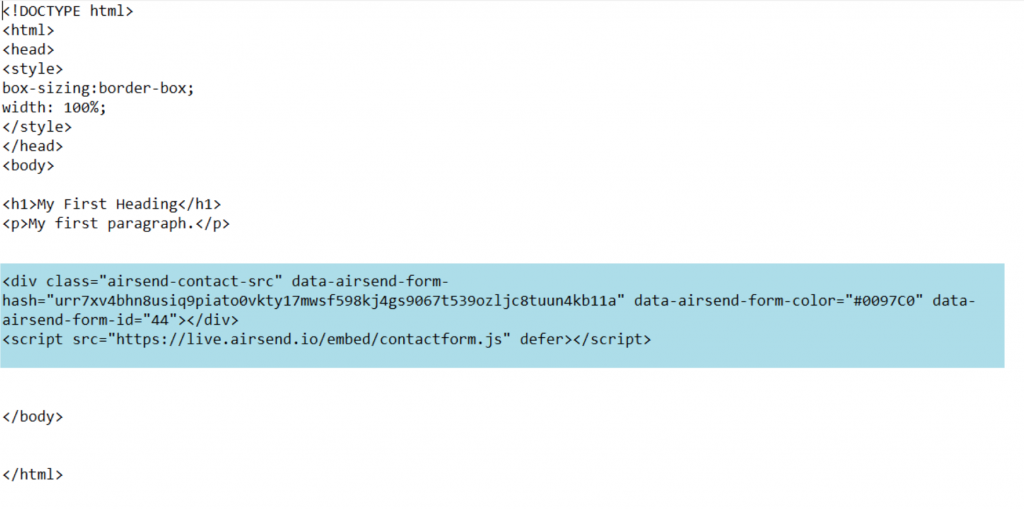
Step 4: Paste Into Your Web Page
The final step is to open the source code of your web page and paste the script into the code before the end </body> tag.
And that’s it! You now have a contact form on your website that connects to your AirSend account.