Sign up before Nov 15 and get one year free (100$ worth)
Please correct the error(s) above!
Thank You!
We received your information and will get back to you!
We're sorry!
Something went wrong. Please try again later.
AirSend service will reach End of Life (Dec 31, 2022) and is going open source. Please export your channel data (actions, files, wiki, and messages) from AirSend for safekeeping.
August 27, 2020
2020’s Best Student Apps for Communication
Month: August 2020
With the new semester starting off, students are looking for the ideal student apps to help them start on the new semester. These student apps can range from improving study methods to maintaining communication with friends and family. In this blog post, we will be focusing on student apps for communication. Here is our list of 2020’s best student apps for communication.
GroupMe
AirSend
Kakao
Telegram
WhatsApp
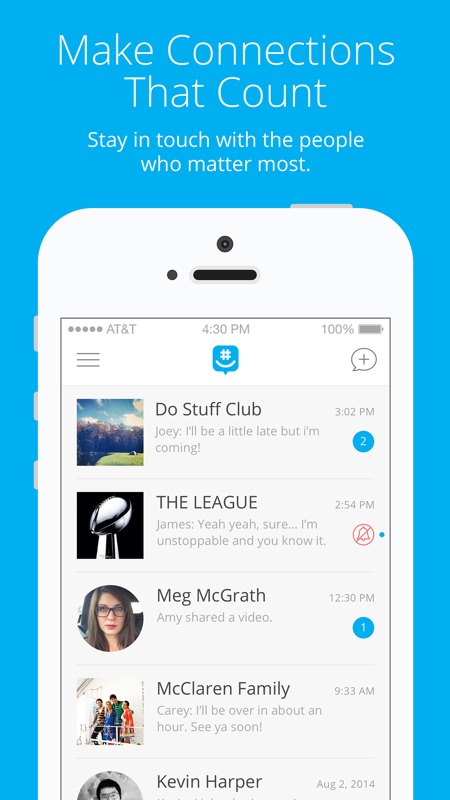
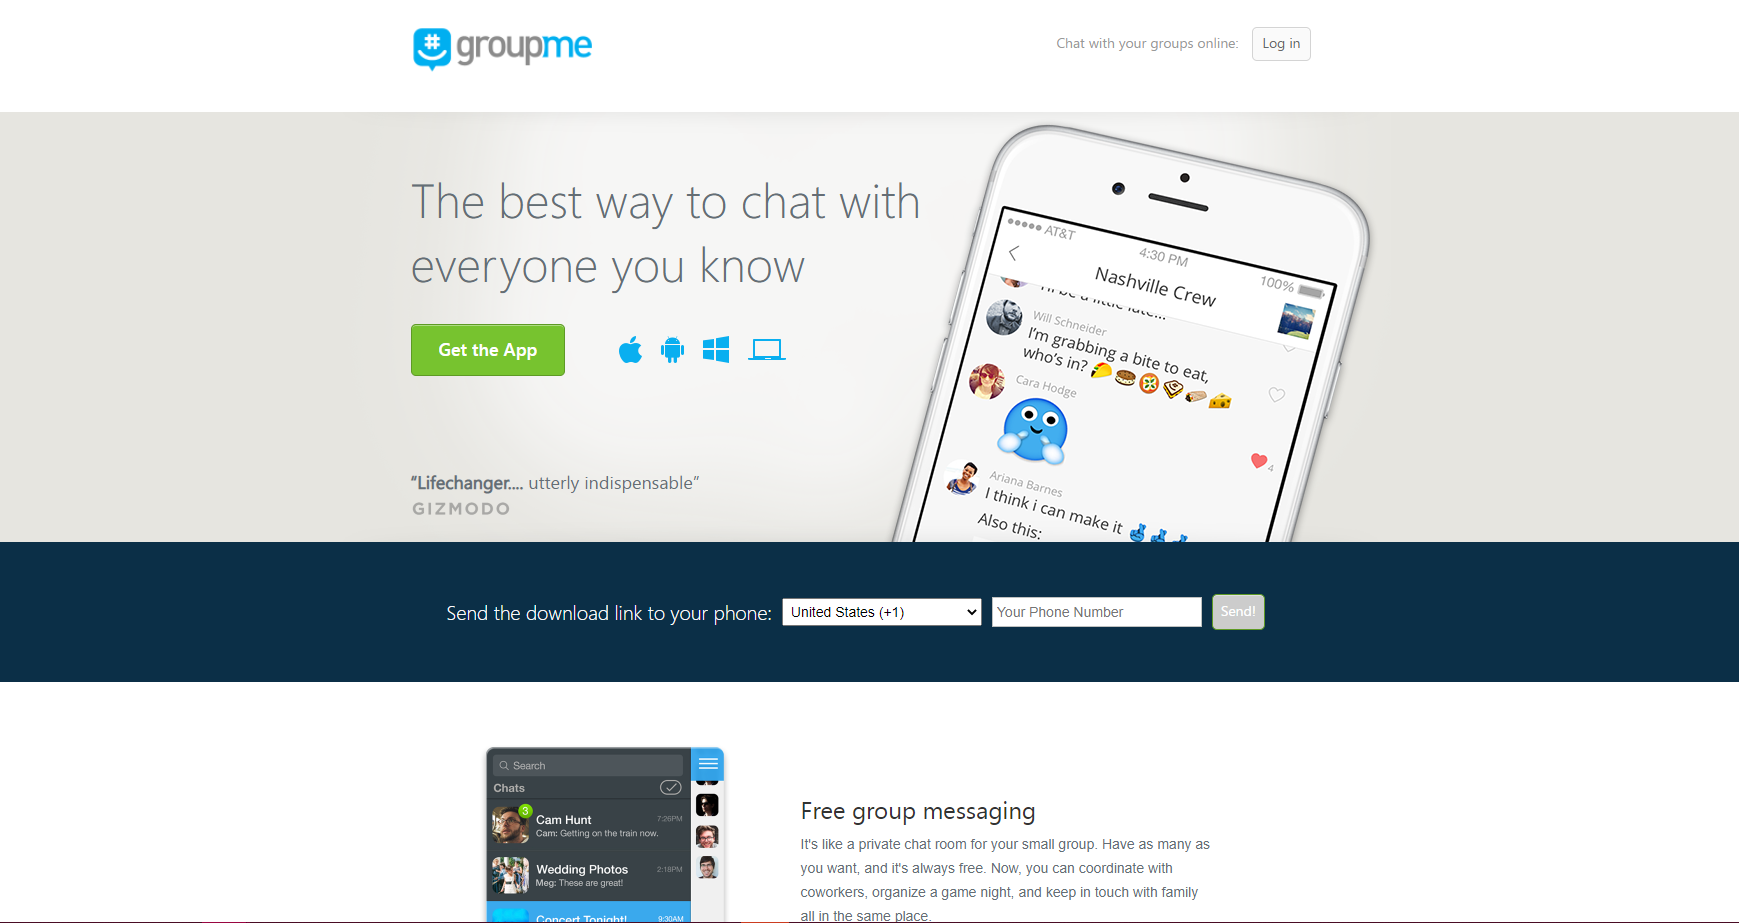
Let’s start off with our first student app, GroupMe.
GroupMe is a mobile group messaging app owned by Microsoft. GroupMe is the go-to student app. With free group messaging, students can easily chat and share videos with each other. Additionally, users can use the apps custom emojis and create personalized GIFS.
However, even though GroupMe is the mainstream student app, it is not that easy or great to use. For instance, with the new Skype call integration, students can now place calls using Skype. But my question is, why not use Skype instead of GroupMe? What is the point of implementing call functionality from another chat app into another chat app?
While the app is convenient to have, many lackluster attributes make using the app questionable. Up until now, there haven’t been any decent alternatives to GroupMe. Until AirSend.
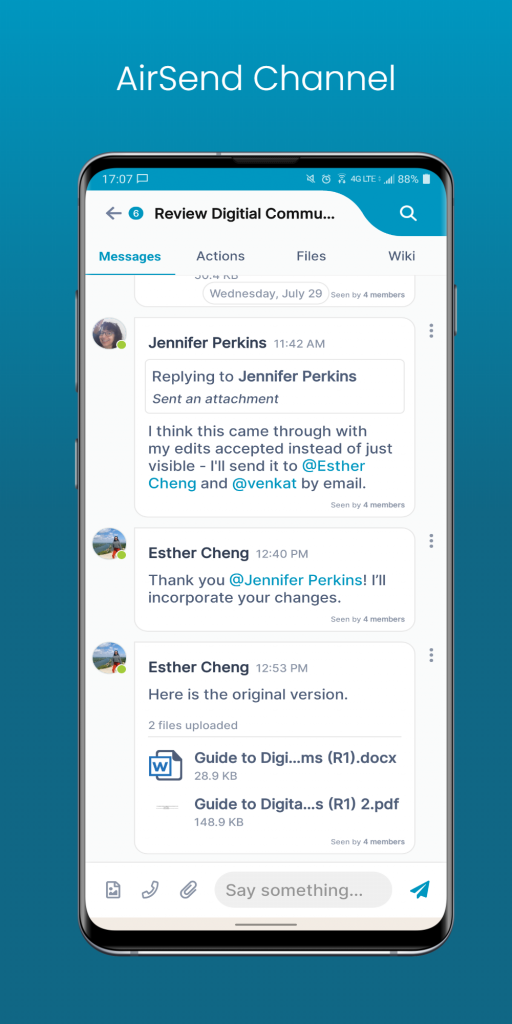
Texting can sometimes be boring. There are new chat apps that provide the solution to mundane texting. AirSend is one of those chat apps. With AirSend, students can seamlessly chat with friends and family, manage their own workspace, and collaborate on projects with their peers. Boiled down, AirSend has everything a student needs:
Emote, sticker, and GIF messaging
File Storage/organization
Built-in File sharing
Video/audio calling
Task management
Note-taking
Create public communities
Communication via channels
Best of all, with AirSend, adding friends and family is super easy. Finally, AirSend offers a clean design with little-to-no clutter. Though we like to think we are the best student app, we need to give credit to other student apps that are just as great as AirSend. For instance, Kakao.
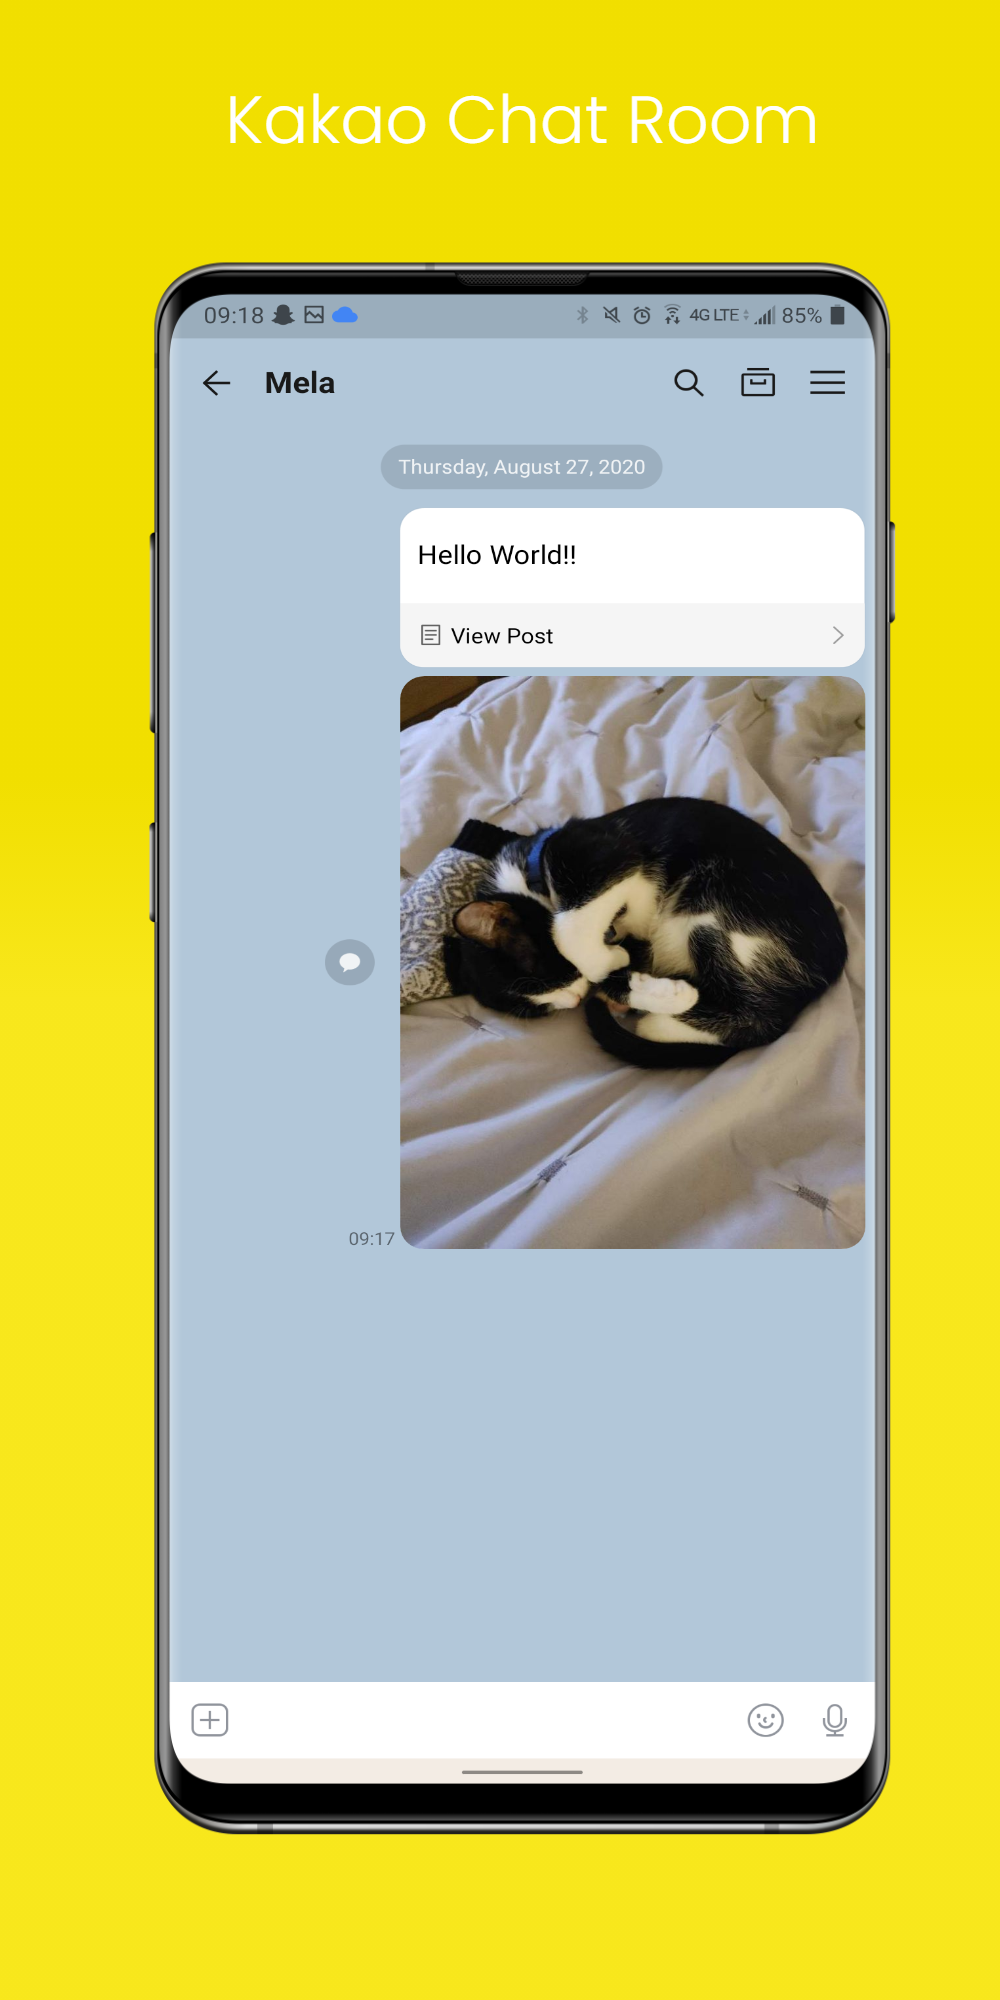
Kakao is a South Korean company established in 2010. Kakao is an easy-to-use and straightforward messenger app. Students can enjoy unlimited free calls with fellow Kakao users. Further, students can:
Chat from anywhere
Send up to 100 MB files
Set chat room transparency
Voice/video calls on PC
Voice filters
Live talks
Calendars
Animated emoticons and pretty themes
And a whole lot more
Kakao is one of those underground chat apps that not a lot of students know about. But once discovered, Kakao can be an entertaining app to use.
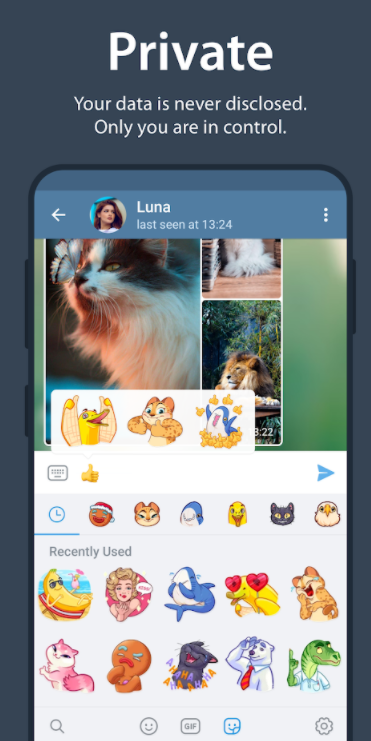
Telegram is a cloud-based mobile and desktop messaging app with a focus on security and speed. Telegram is a simple-to-use messaging app that is private, open, and powerful. What do I mean by private, open, and powerful? Let me break it down.
Private: Telegram messages are heavily encrypted and can self-destruct. Self-destruct meaning that you can eliminate all messages with no trace-down history.
Open: Telegram is an open API and source code free for everyone.
Powerful: Students can send images up to no file size limit.
Among many other attributes, Telegram is a free and much better alternative than most other chat apps. Using the app myself, I felt that it was a comfortable student app to use. Though I must admit that in the beginning, it was a bit difficult to use. Next on our list is WhatsApp.
WhatsApp is one of the more common overrated student apps. We hypothesized that the only reason students use the app is that they haven’t yet found a better alternative (but now they do). However, I still feel compelled to mention WhatsApp on our best student app list because it is highly used.
WhatsApp offers:
Chat
Sharing files
Voice and video calls
The app is extremely limited in customization, but it still gets the job done. The other major annoyance with the app is that images and videos go directly to your personal multimedia library. I do not know about you, but I would prefer not to see other people’s families in my photo library.
Summary
Each student app has its positives and negatives. Though GroupMe is the mainstream app, there are much better alternatives. AirSend and Kakao are great student apps for customization, video and audio calling, and seamless messaging. Telegram is for those who want tighter security. WhatsApp is a good app for those who are looking for simplicity and limited customization.
The largest messaging app in China, WeChat offers users a variety of capabilities beyond messaging, including file sharing, voice and video calling, and even mini-games. The downside to the app is that its users lack privacy, which explains why the U.S. government is considering placing restrictions on WeChat for national security reasons.
As uncertainty surrounds the restrictions that U.S. users of WeChat may soon face, people are looking for WeChat alternatives to help stay in touch. Below are our three favorite alternatives to WeChat.
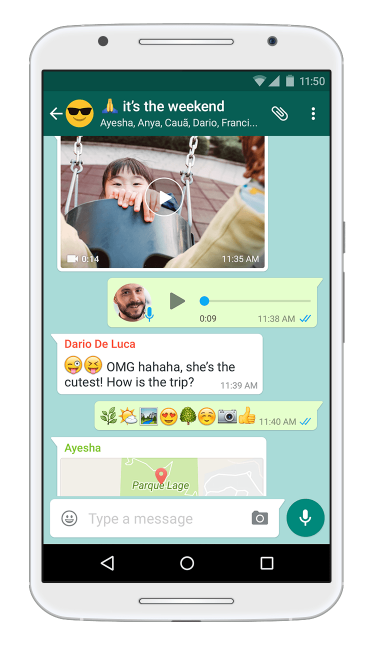
Like WeChat, WhatsApp has a large number of users (over 2 billion). You can use WhatsApp to chat, share files, and have voice and video calls. You can also set an image or video Status that lets your friends and colleagues know how your day is going.
The downsides to WhatsApp are that the images and videos that people share go directly into the multimedia library of your phone, which can get annoying. And the number of users allowed on a group video call at one time is eight.
AirSend is the best new way to chat, share files, and have voice and video calls. The app’s additional capabilities — screen sharing in calls, file storage and organization, and task management — make it particularly useful in ways that WhatsApp and Skype cannot compete. You can also make each messaging channel special by customizing the chat background and logo.
The downside to AirSend is that there is no place to post status updates in your profile, and it currently lacks fun GIFs and a wider variety of emojis.
There’s a reason almost everyone has heard of Skype. Before Zoom came along, Skype was the gold standard of video conferencing apps. The reason Skype makes it on our list (and not Zoom) is because it has the messaging components and capabilities that Zoom lacks.
With Skype, you can send messages, share files, have online voice and video calls, and even make calls to phones. It also comes with a big GIF library to make chatting a little more fun.
The downsides to Skype are that it costs money to communicate with people who don’t use the app and that voice and video call quality can be spotty at times.
As you can see, there are a variety of good alternatives to WeChat, so there’s no need to fear even if usage is restricted in the future.
Between WhatsApp, AirSend, and Skype, the WeChat alternative that will work best for you will depend on what you need a messaging app for. If you want an app purely for casual or social use, either WhatsApp or Skype might be the one for you since you can post status updates and use a variety of fun GIFs and emojis to communicate your feelings. If you need an app for business use as well as casual use, then AirSend is the way to go with its additional capabilities that will make your life easier.
AirSend is a versatile digital workspace to share files, send messages, and complete tasks. Click here to see how AirSend can help you.
Do you ever have struggles with learning how to delete messages on GroupMe? Or perhaps, how to search for messages or join a group on GroupMe? The main question we should be asking ourselves is why GroupMe is challenging to use? Is there not a better alternative? Well, yes, AirSend. AirSend answers all the questions users ask of GroupMe and more. In this blog post, we will give a detailed comparison of AirSend and GroupMe. But before we begin, let’s talk about what type of qualities should be in a chat app.
What Qualities Should Be in a Chat App?
Chat apps are great for talking with friends and family. Chat apps should be user intuitive, clean, and visually appealing. The goal when using a chat app is to maintain that connection we have with others. Chat apps need several attributes to preserve relationships. Characteristics, such as:
User friendly
Clean design
People want to use an app that makes them feel good. An app that makes connecting with others more comfortable. Attributes as the ones stated above are the keys to having a successful chat app. Not only is the app easy-to-use, but it is also aesthetically appealing- so why wouldn’t you use the app? We are going to look at AirSend and GroupMe in each respective category of quality.
User Friendly
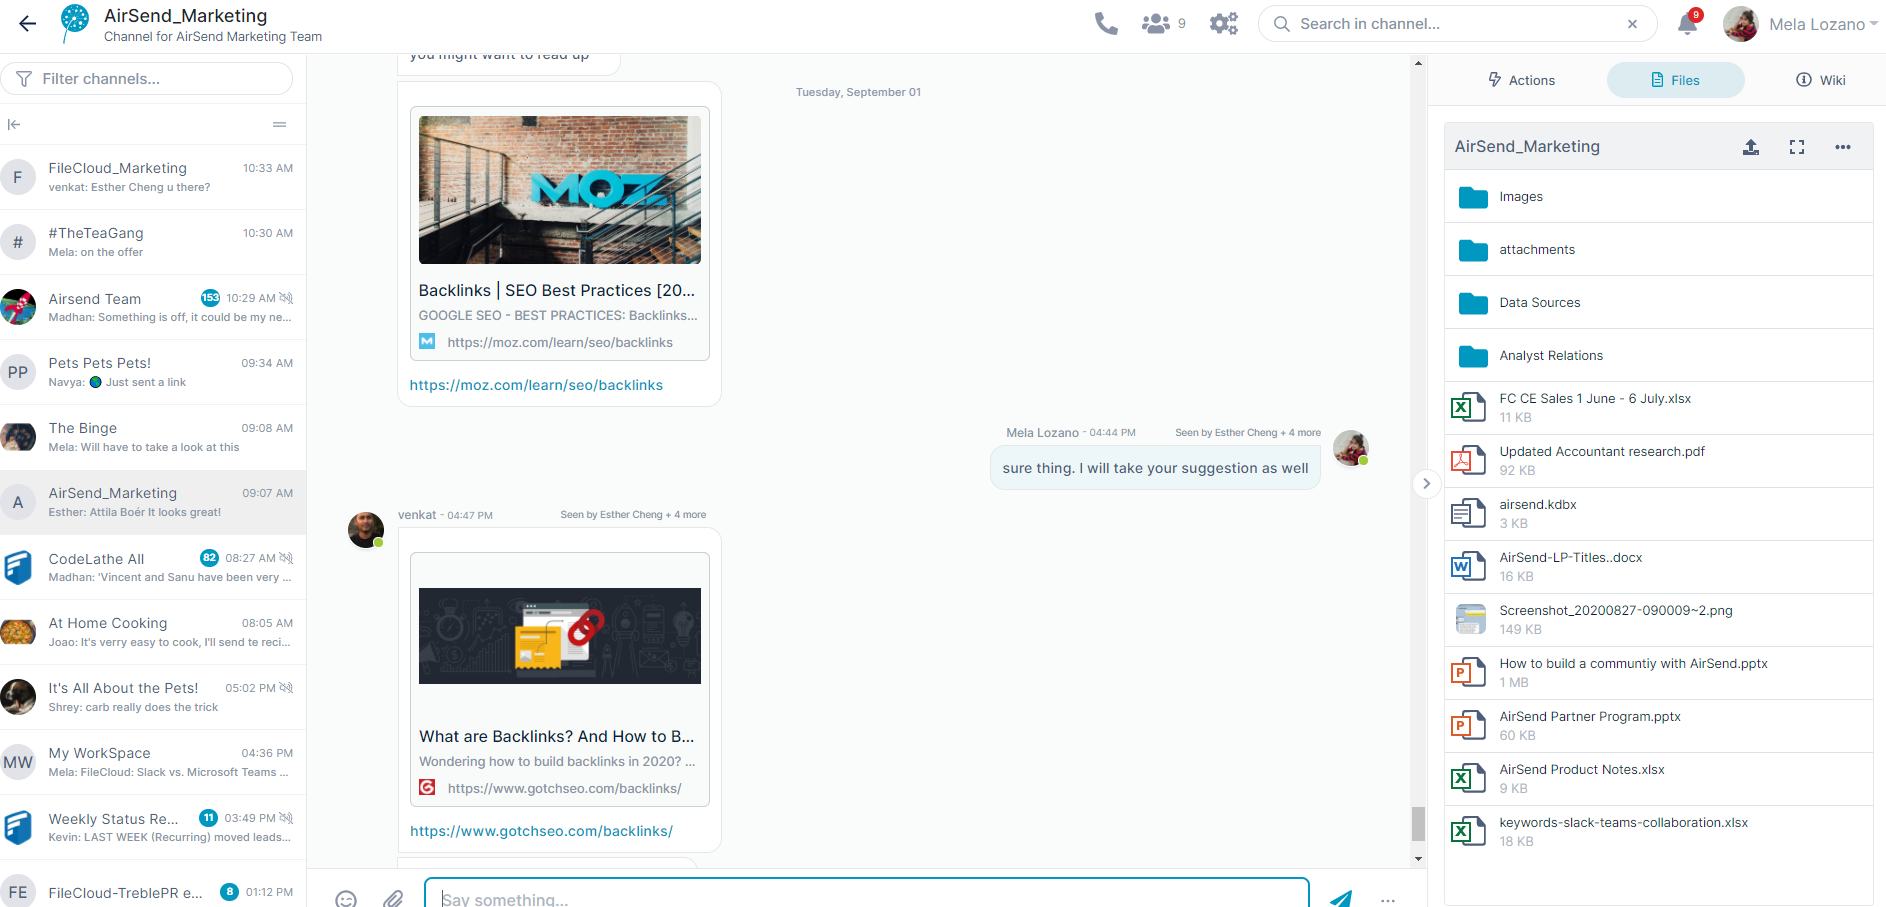
AirSend
What do we mean by user friendly? Well, the platform should be easy-to-use, with no questions of “How do I use this? What does this button do?” Anything and everything in the chat app should be readable, clear, and easy-to-understand. We believe that AirSend is successful in this category.
With AirSend, users can easily send messages with our large text bar located at the bottom. Additionally, it is super easy to upload images with the paperclip icon. Furthermore, and what we consider to be the best is that users can easily find their files and photos with the large file tab. Friends can easily create and organize folders and share memes of cats. At the same time, friends can easily hop into their family channel and share family photos and plans for dinner through a video/audio call.
Or, if you are a student, AirSend would be perfect for a collaboration tool. Students can:
Hold project meetings with our built-in video/audio calling
Create tasks
Customize their workspace
Talk with other students in your class
Upload important assignments, rubrics, and lecture notes
Finally, AirSend is super easy-to-use both via mobile app and web. Best of all, unlike GroupMe, users won’t have trouble signing in or adding friends/families to channels. Instead, everyone will stay connected all the time.
GroupMe
GroupMe, on the other hand, is a bit more complex to use. While switching between channels is easy, carrying a conversation is not. With GroupMe, there is a compact design, making things hard to find. For instance, the app isn’t clear when it comes to finding members in a channel, muting a channel, finding your gallery, or even changing your group avatar/name. With GroupMe, there is a lack of distinct features within the app, making it difficult to understand the potentials the app could do.
Additionally, there is a new Skype integration within the app. Having Skype integration means leaving the GroupMe app to have a call within another chat app. This Skype integration can appear confusing for some users- because why use a chat app that uses a calling integration within another chat app?
Unlike AirSend, there are currently some difficulties with using the web version of GroupMe. Finally, according to some users, notifications fail to alert users of new messages. Next, let’s take a look at both apps from the perspective of a clean design.
Clean Design
In terms of a clean design, a chat app should carry:
Clear and easy-to-find features
Visually appealing design- beautiful color matching
An organized layout
AirSend
AirSend fits all these attributes. With AirSend, users can easily find their tasks, files, notebook, and text bar. Having this organized design makes these features easy-to-find, build connections with others, and collaborate with peers.
GroupMe
With GroupMe, there are a few complexities to its design. Because everything is compact, there is a claustrophobic feeling when using the app. Every feature is organized into hard-to-find sections.
Additionally, the different color messages of blue and white are unappealing. Finally, there is a non-professional look to GroupMe’s overall design. Having a non-professional look is suitable for casual conversation. However, if you are talking with professors or holding virtual presentations, it would be nice to have a professional and straightforward design.
Conclusion
Both platforms are right to use for what they are designed to do. However, looking from a more in-depth perspective of being user friendly and clean design, it is apparent that AirSend may be the better choice.
With AirSend, friends, families, and students can chat all in one place. Students can chat with families, while also chatting with friends, while also hosting a project meeting. Further, getting work done through AirSend is very easy due to its organized layout of tasks, file management, and notebooks.
How to Leave us Feedback
We are always seeking to improve our product, so all feedback is appreciated. To find out where to leave comments and/or suggestions, you can visit our public channel or visit us at our support page.
AirSend is a versatile digital workspace that allows users to share files, send messages, and complete tasks. See how AirSend can help you.
We are back with another blog post on How to Build an Online Community with AirSend vs. Discord. We recently wrote about Discord vs. AirSend: Roles and Permissions Explained, which you can read about by clicking here. In this blog post, we will be explaining how to jumpstart your community with a basic setup of your community through AirSend and Discord.
When creating a community, it is important to consider the following:
Choosing your niche
Choosing the right platform
Picking your niche is easy, however, when choosing the right platform, things can get a little tricky. There are many factors to consider when choosing the perfect platform to host your community. Factors, such as:
User friendly
Visually appealing
Welcoming
Now that we’ve covered what factors and considerations need to be taken into creating a community, let’s talk how to design your community. Let’s begin with AirSend.
AirSend
AirSend is a great platform to build genuine relationships through an intimate conversation space.
With an AirSend community, users can experience:
Clean and organized design
Full control over your community
Deep connections and profound conversations
Here’s how to build a community with AirSend.
How to Build a Community with AirSend
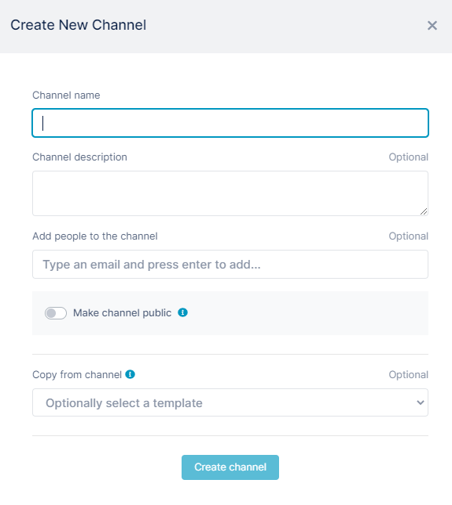
Step One: Creating a public channel
Type your community name in the “channel name” section.
Provide a description for your community in the box titled, “channel description”
Check off “make channel public”
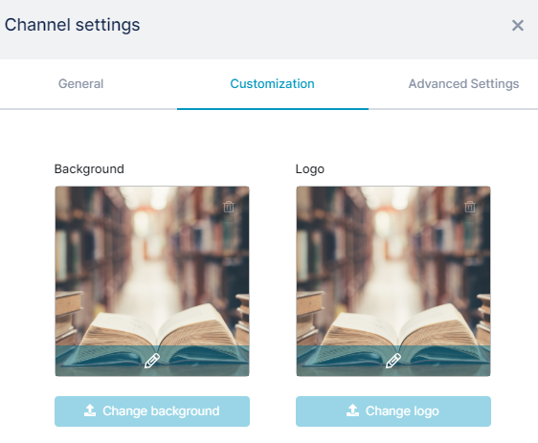
Step Two: Customize your Community with Logos and Backgrounds
Found in your settings, users can customize their community with a background and logo. Here are the steps:
Go to your settings (marked as the three-geared icon)
Click on the “customization” tab
Upload your background and logo image
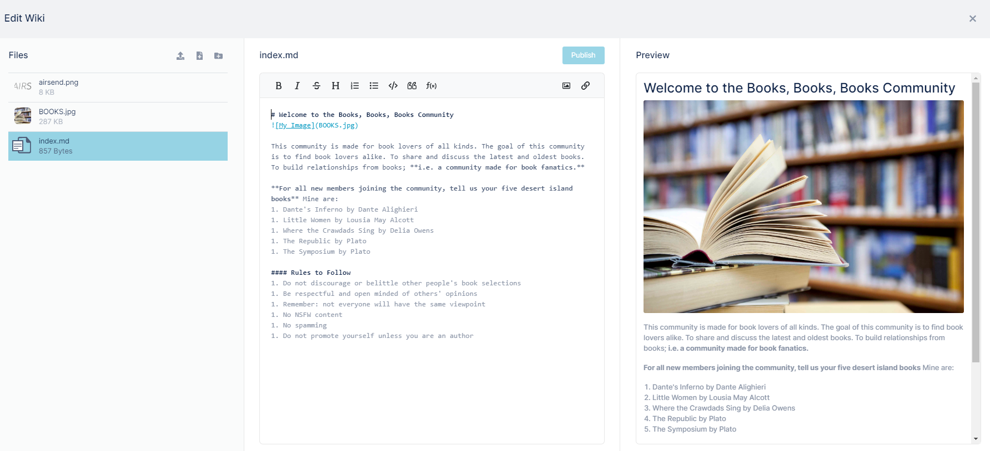
Step Three: Customize your Community with a Built-in Guidebook
Your bulletin board/guidebook is the golden area to advertise what your community is all about. Here are the steps to customize your community:
Click on the pencil icon to edit your guidebook
Upload your pictures and links
Customize your community with different headings
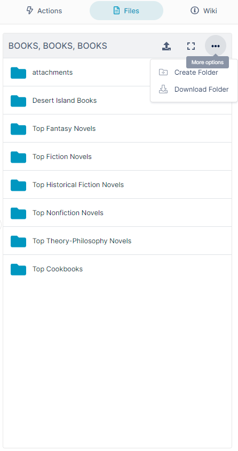
Step Four: Customize your Folders
Having folders is a great way to keep track of anything mentioned in your community. Instead of scrolling through so many conversations, find the thing you are looking for through a designated folder.
To create your folders:
Click on the three dots located on the right-hand side
Click “create folder”
Once you are done creating your folders, the last task is to assign member roles.
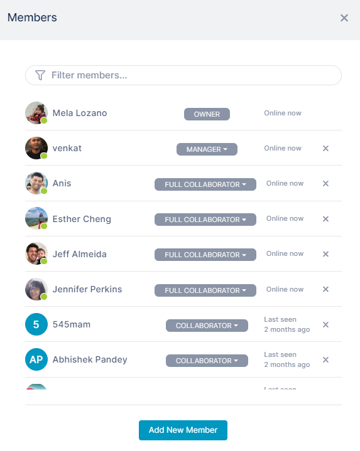
Step Five: Assign Member Roles
After adding your final cosmetics to your community, it is time to assign member roles. Providing roles allow for stability and organization within a community. The roles AirSend offers are:
Viewer: Read messages, wiki, and download files
Collaborator: Post messages, read wiki, files, and actions
Full Collaborator: Post messages, edit the wiki, and upload files and images
Manager: Same as a full collaborator and manage users
Admin: Full control of the channel and change member roles
The great thing about designing a community with AirSend is that it takes no time at all. With our user-friendly platform, communities can build close conversations through clean designs and intimate conversation space.
Discord on-the-other-hand is a more complex platform. Their platform is known for its unlimited customization, which can be a good thing and a bad thing.
How to Build a Discord Community
Discord takes the approach of dynamic user roles. What we mean by dynamic user roles is customized user roles. On top of that, users can customize channel preferences, add bots to run and stabilize servers, make private channels, and many more. However, with many customizations comes many complexities. And with many complexities come some difficulties in using Discord. One difficulty that is apparent when using the platform is its use of customized roles.
For example, Server A has specified permissions for its members. Members have permission to:
Post in channel
Share files
Invite other members to the community
Now, let’s say we want to join another community, Server B. Because there is full-fledged customization, creators of the server can check off specified permissions for their roles that may be different from other servers. In Server B, members can have permission to:
Post in Channel
Share files
Add reactions
But they cannot invite other members to the community like Server A can. Members cannot view what permissions they have. Now, imagine this with higher roles.
Let’s say there are Moderators in Server A and Server B. Server A has specific permissions to kick members out. In Server B, those same moderators from Server A do not have the permission to kick members out. This is not apparent to the moderators, thus confusion and complexities are formed.
Having customized roles is not always a bad thing. For some this can be a huge plus. It is also important to note that having so many ways to customize a Discord community also means having to spend a lot of time getting it ready.
Here is how to set up your basic Discord community.
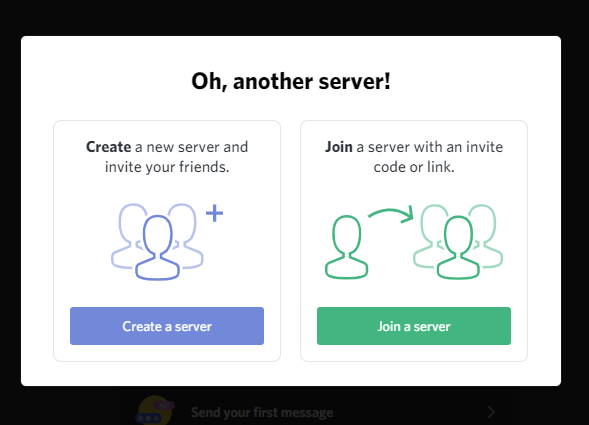
Step One: Create a Discord Community Server
Click on the large green plus icon in the bottom left-side panel
Click on “create a server”
After creating your server, it is time to name your community and upload an image.
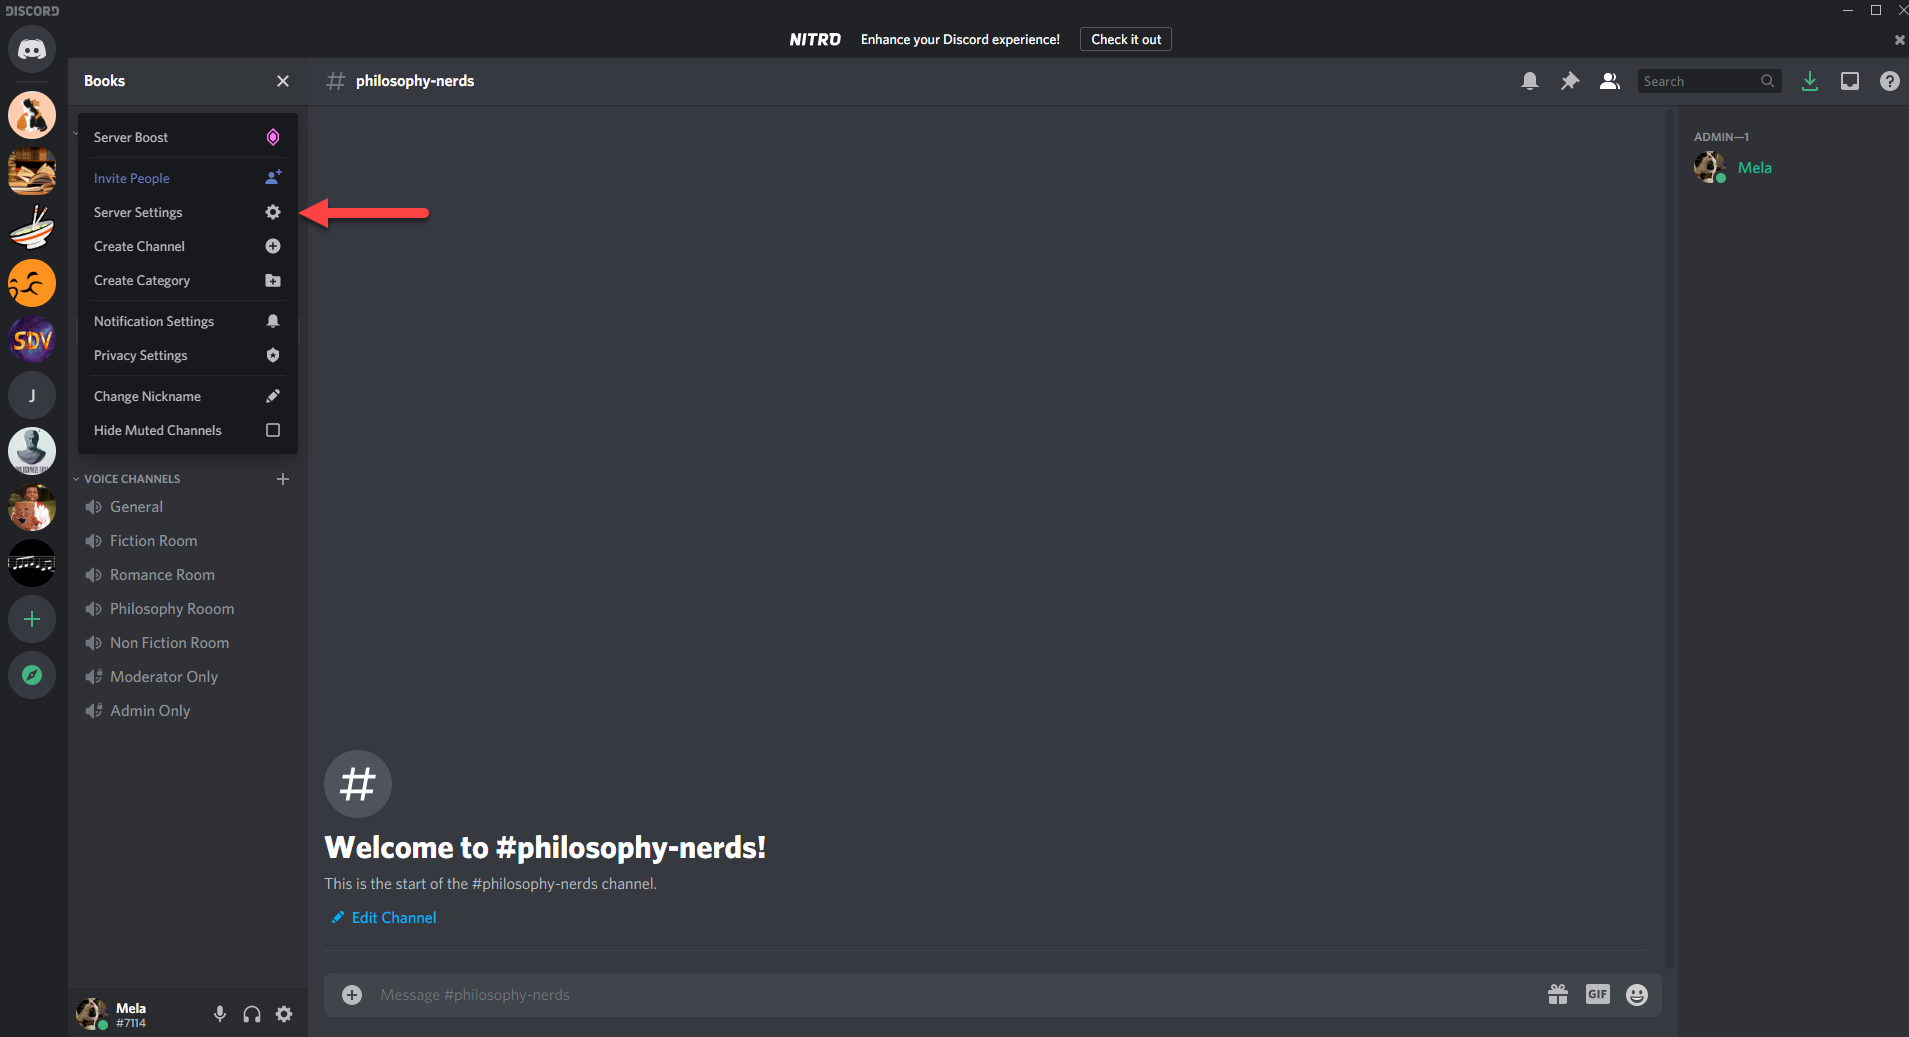
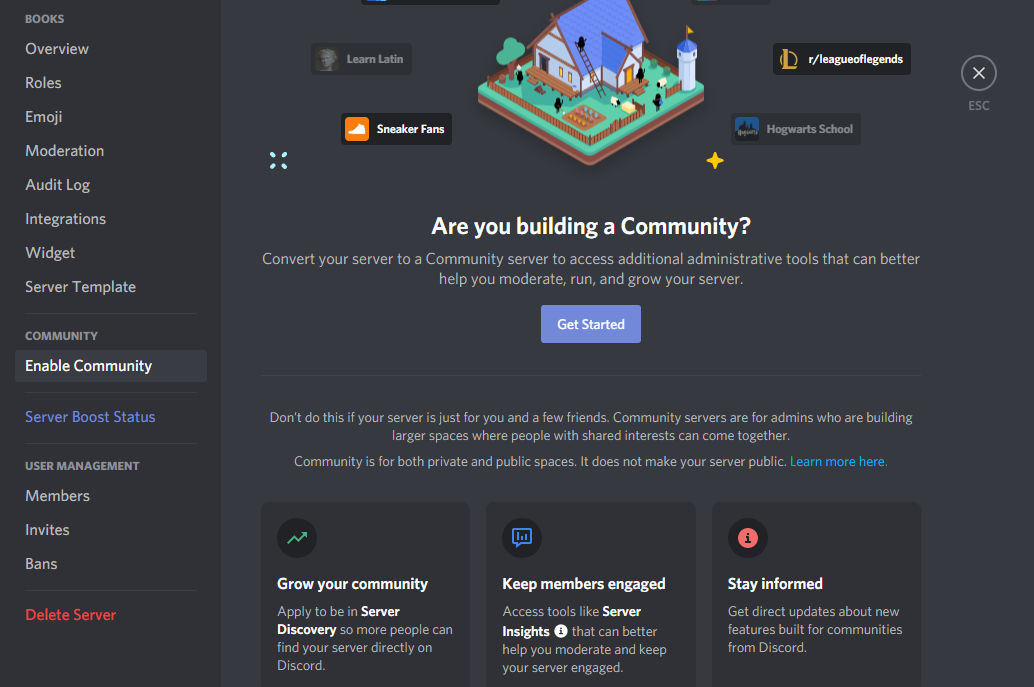
Step Two: Customize your Community- Name and Server Image
After creating a server, Discord will ask you what to name your server. Once you created a name for your server, go to your server settings to upload your desired image. Once you upload your community image, it is time to customize your user roles according to the Discord community you want to create.
The red arrow points to server settings found under server name.
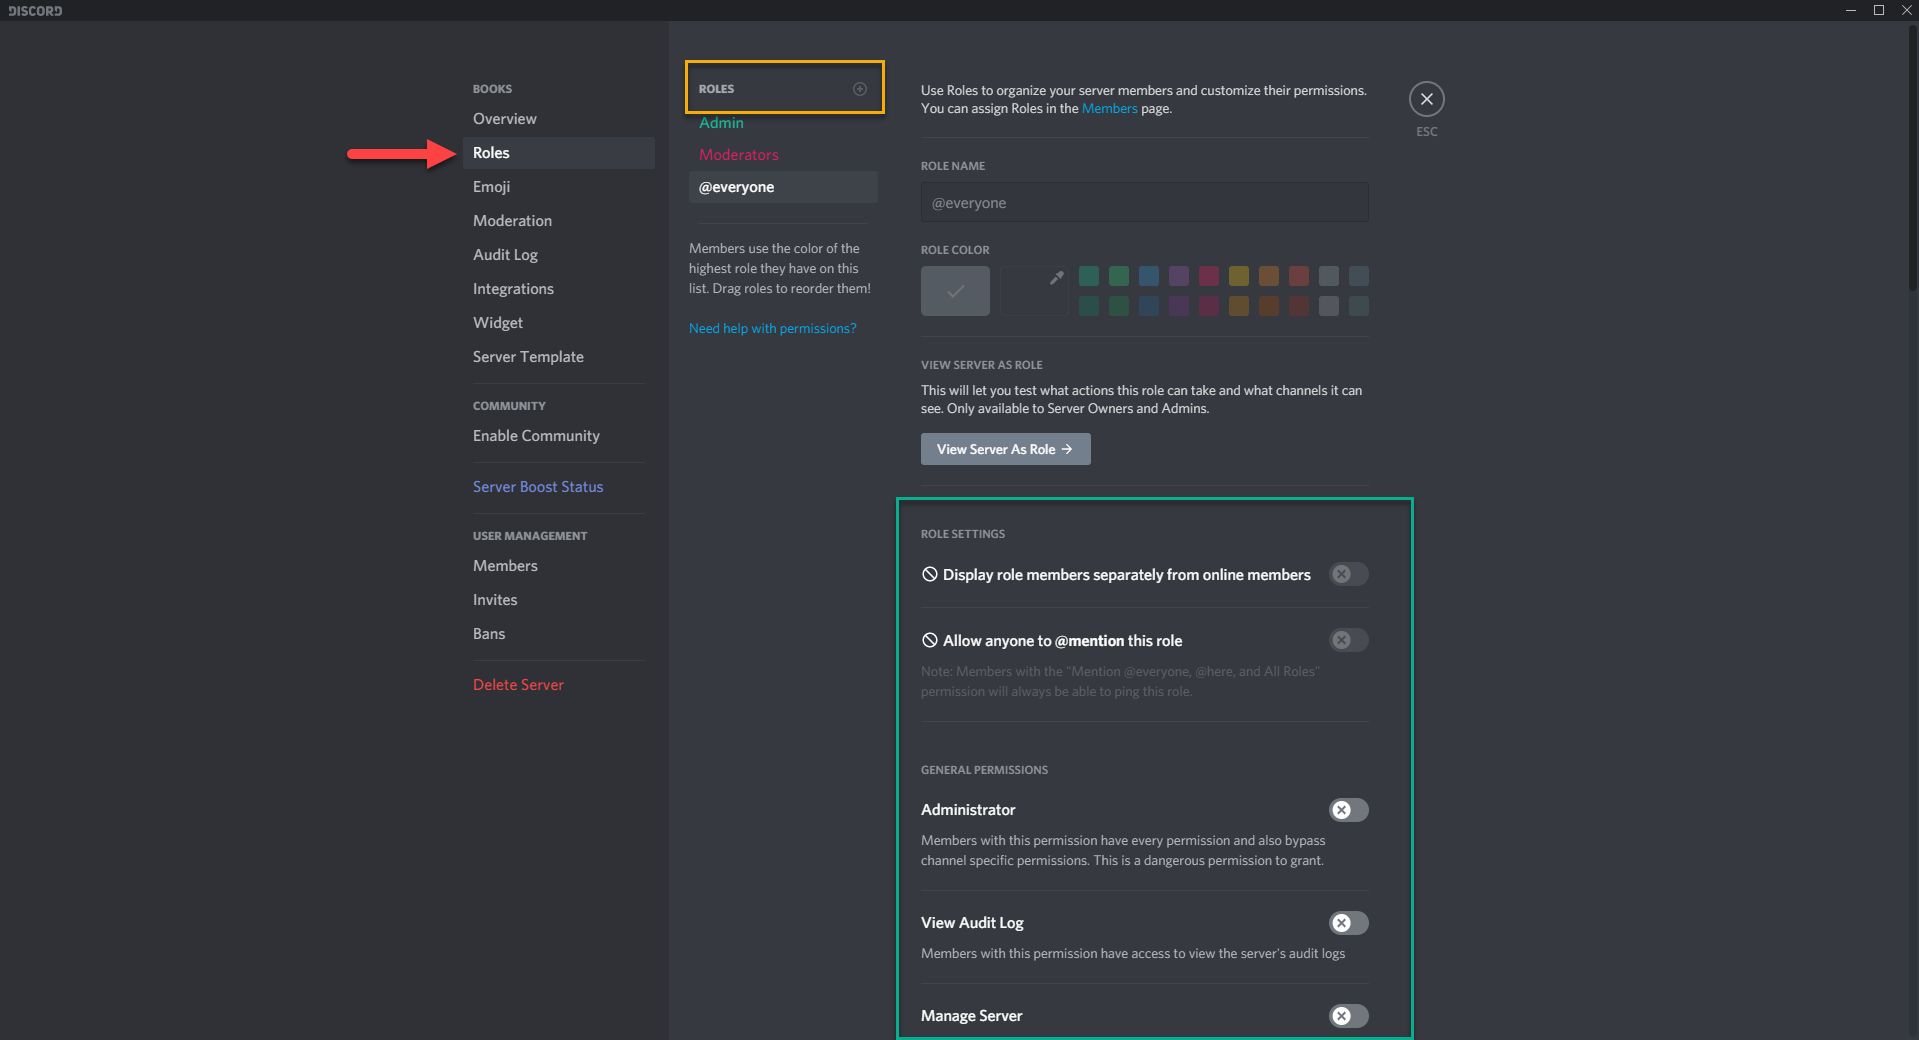
Step Three: Assign Customized Roles for Your Discord Community
The red arrow indicates role setting. The yellow box is where you add users. The green box is where you set customized preferences for your roles.
Once you are in the sever settings, click on the button labeled as roles. The image above should be what you are currently seeing. In the image above there is a yellow box. In the yellow box is a plus icon. Click on the plus icon to create new roles.
In the green box, are all the functionalities a role member can have. Each role has customized permissions to a channel. And each role carries a customized name. These names can range from Admins, Community Manager, Mods, Helpers, Servers Guide, etc.
Once all your roles are established, the next step is to create all your channels.
Step Four: Creating Channels
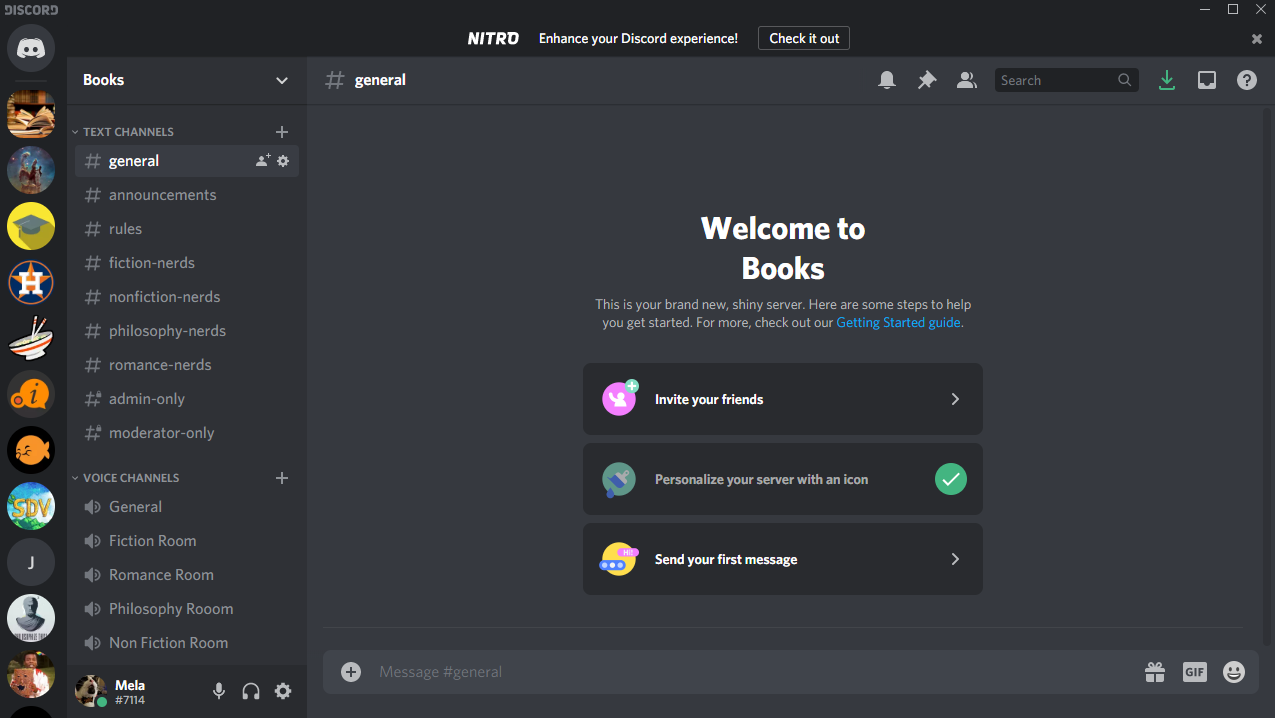
Noted in the image above is a Discord community. As one can see, there is a list of channels and audio channels. Normally the standard channels to have in a Discord community are:
Announcements
Rules
General
Private Channels
Extra channels that apply to the community
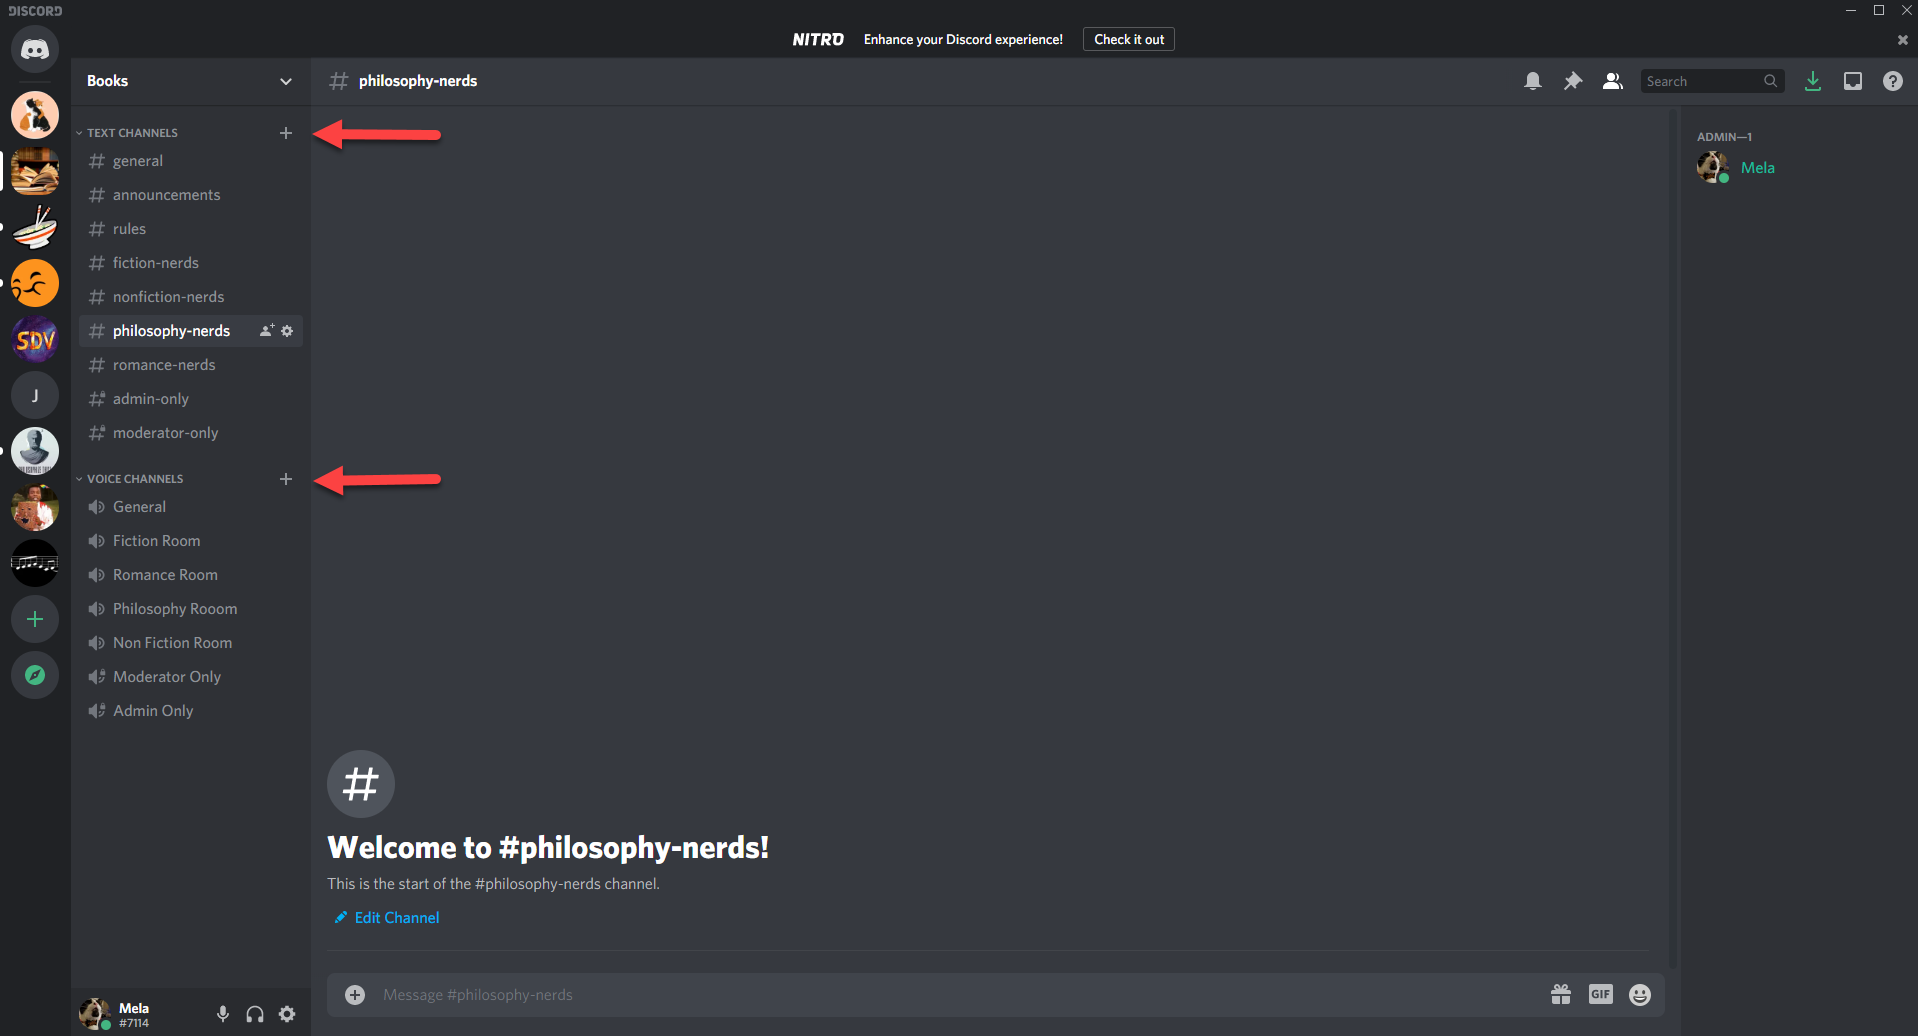
To create channels, click on the small plus icon next to “text channels” and “voice channels.”
Red arrows point to plus icon next to text channel and audio channel. Plus icon creates channels.
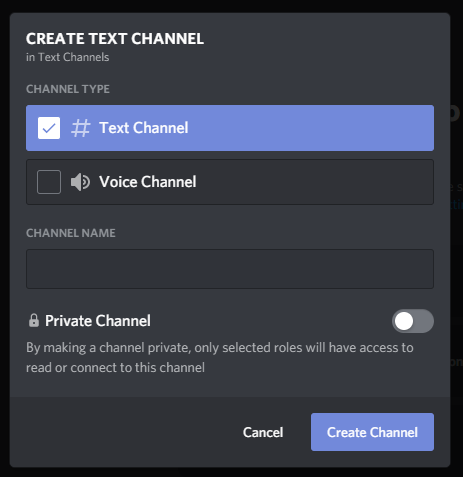
When you create a channel, Discord will ask if you want to create a text channel or a voice channel. After you selected your channel type, you will need to input a channel name.
As mentioned before, users can create private channels. Private channels mean member access-only. In other words, an admin-only channel means only admins can view the channel. The same thing with moderator-only channels. Only moderators can view the channel.
Having multiple channels is both good and bad. The great thing about having multiple channels in Discord is that it ensures organized communication. The bad thing is that if you are a small group of friends, organized communication is not necessary- especially for people who do not prefer extensive customization options.
The Dilemma with Discord
The dilemma with Discord is that sometimes it can be a mental overload for people. The Discord community server can be a lot to handle with choosing various customized roles and setting up customized channel preferences.
Further, Discord is not perfect for small communities. Small communities only need one stream of conversation. Not a platform that has a plethora of channels that carry different conversations.
For example, let’s say a group of friends decide to set up a group chat. Because Discord offers unlimited channels, most users feel the need to create subject-oriented channels.
For instance, having a group of channels labeled fitness and adventures. The text channels would be labeled as hiking, images, online workouts, yoga, and strength training. Then you would have audio channels labeled as workout rooms one, two, and three.
Then you have another group of channels labeled as food adventures. Several text channels could include recipes, images, and city-based restaurants. Because of the multiple subject-oriented rooms, it can be difficult for users to decide which channel they want to use for an ongoing conversation.
For instance, having a conversation about restaurants that transition to the topic of recipes would suggest a user might want to switch to the recipe channel. And if they don’t switch, what is the point of creating the various channels in the first place?
After your channels are set up, it is time to set up your channel preferences.
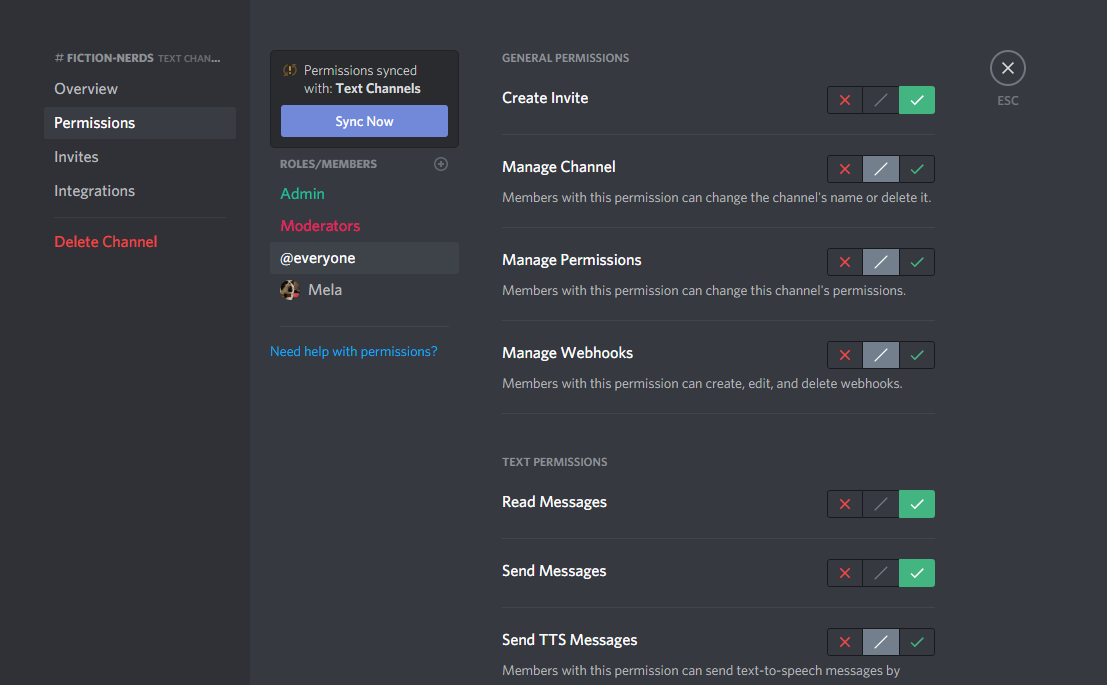
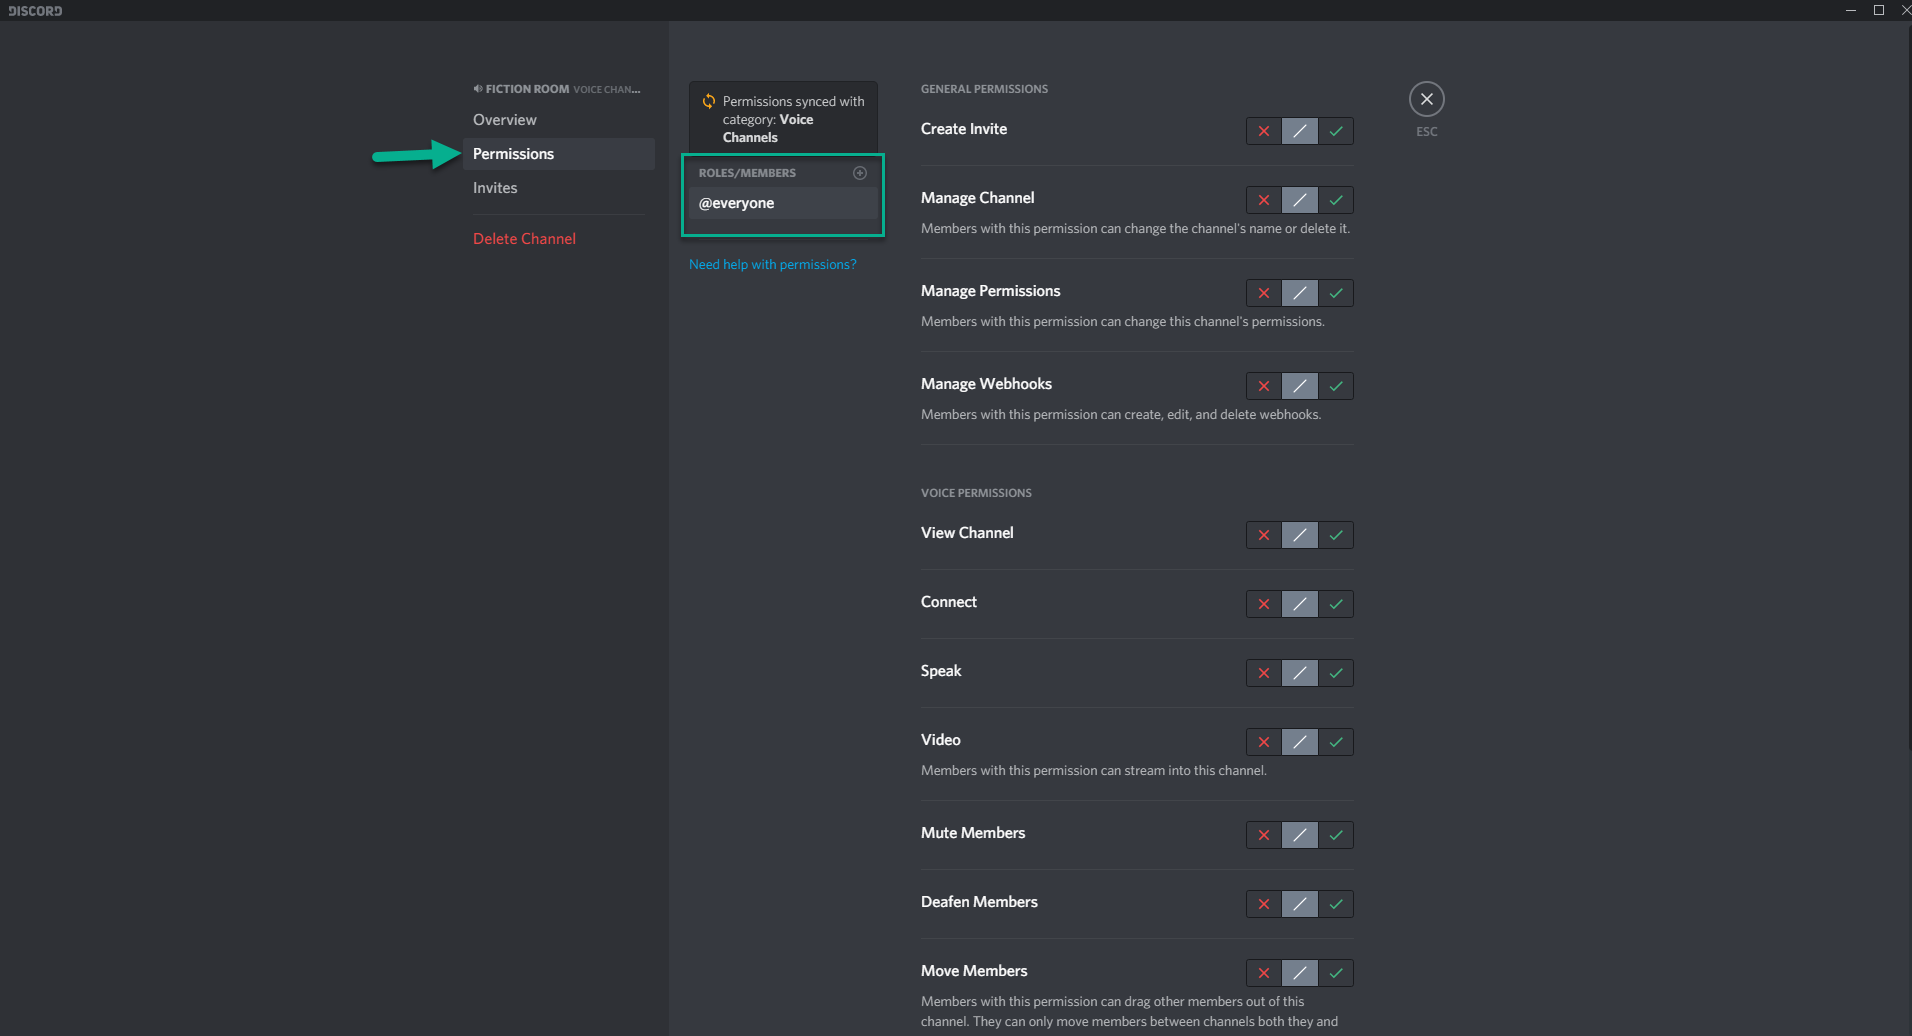
Step Five: Setting Channel Preferences
Yes, setting up channel preferences. Not only do you get to set up customized member roles, but you also can set up specific permissions for each member in each channel.
Hover over the channel you want to set preferences for. Once you hover over the channel, there should be a small gear icon located to the right of the channel name. Click on that.
Next, click on permissions. To customize permissions for each member, click on the small plus icon under labeled as roles and members. In the image below, roles and members should be in the green box. There will be a drop-down menu that appears with a list of roles.
You will have the ability to customize channel permission for each role. The customized preferences can be different for each channel you created.
The green arrow point to the button labeled as permissions. The green box indicates where to add roles.
Now that your basic community is set up, it is time to promote your community.
Step Six: Promoting your Community
You can even how to make a Discord server public by following these easy steps. This can give your community a wider reach.
Now, if all these steps that I mentioned confused you, don’t worry. We made a video that shows you how to create a community with AirSend and Discord.
How to Create a Community with AirSend and Discord
Summary
Ultimately, both platforms are great to use to start your community. If you want something easy to maintain with a clean design, AirSend is the choice. However, if you want a platform with the bells and whistles attached, creating a Discord community may be the wiser choice.
Making a digital sales room with AirSend.
With the increasing prevalence of remote work and improvements in technology, digital sales rooms are becoming more and more common. A digital sales room is a digital space where sales people collaborate with team members and communicate with potential customers.
In an ideal digital sales room, sales people can send messages to potential clients, have voice or video calls on the spot, share files, and have everything in one place to easily keep things organized. With these capabilities readily on-hand, sales people are able to make more wins from their sales proposals and can create long-term value. They are also better able to visualize and manage the full customer decision journey.
The rest of this blog post will show you how to set up and use AirSend as a digital sales room.
Step 1: Create a Channel Template for Potential Customers
Make a channel template in your AirSend account.
Make a channel template with all of the files and Wiki information that every potential customer needs to get started. That way you don’t need to waste time copying and pasting canned email messages and attaching the same PDFs or PowerPoints over and over again.
Step 2: Duplicate the Channel for Each New Lead
Duplicate your AirSend Channel for new leads.
After you have your channel template, you can then duplicate the channel for each new lead.
Step 3: Easily Take Your Leads Through the Customer Decision Journey with Messaging, File Sharing, and Voice and Video Calling
Complete the sales process within the AirSend Channel.
Within each customer channel, you can receive and answer questions, share additional information, and jump directly into a voice or video call. You can complete the entire sales life cycle within the AirSend Channel.
As you can see, you can use AirSend to create a digital sales room that allows sales people to easily manage their customer communications and collaborate with each other.
If you have any questions, feel free to ask them here.
Have conversations, share files, complete tasks, and get work done in one space.