Recently we released a video on how to make video and audio calls with AirSend. In this blog post, we are going to list the step-by-step process. There are two ways to start a call with AirSend. Let’s begin with our favorite and simple way.
Hitting the Phone Icon
To instantly start a call, hit the phone icon located at the top of the screen next to the people icon.

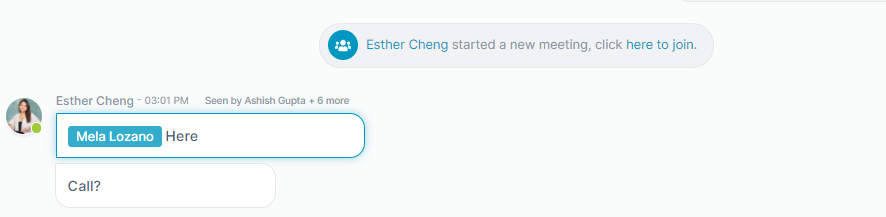
In AirSend, to join a call, there will be a link in the channel for users to click on to take them to the meeting automatically.
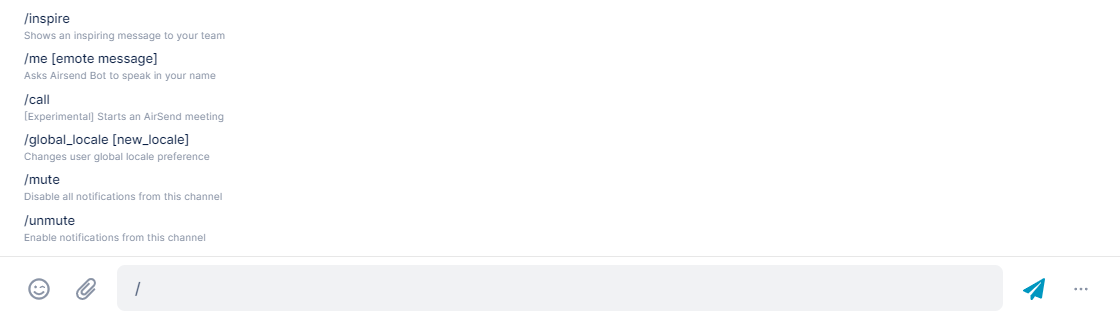
The second way to start a call is through slash commands.
Slash Commands
There are many features to our slash commands. One of which is, of course, calling. Type “/” for the list of options to appear.
And as always, we like to keep things simple. So, of course, it is only natural to have a clean and straightforward calling interface. When you are in a conference call, you have the option to:
- View your settings
- Profile
- Notifications
- Audio and Video
- Password
- Mute/Unmute
- Webcam
- Screen sharing
- Maximize calling screen
- Built-in chat
Now, we know this sounds like a lot, and it is. But we have taken these features and implemented them into a clean design where everything is easy to find.
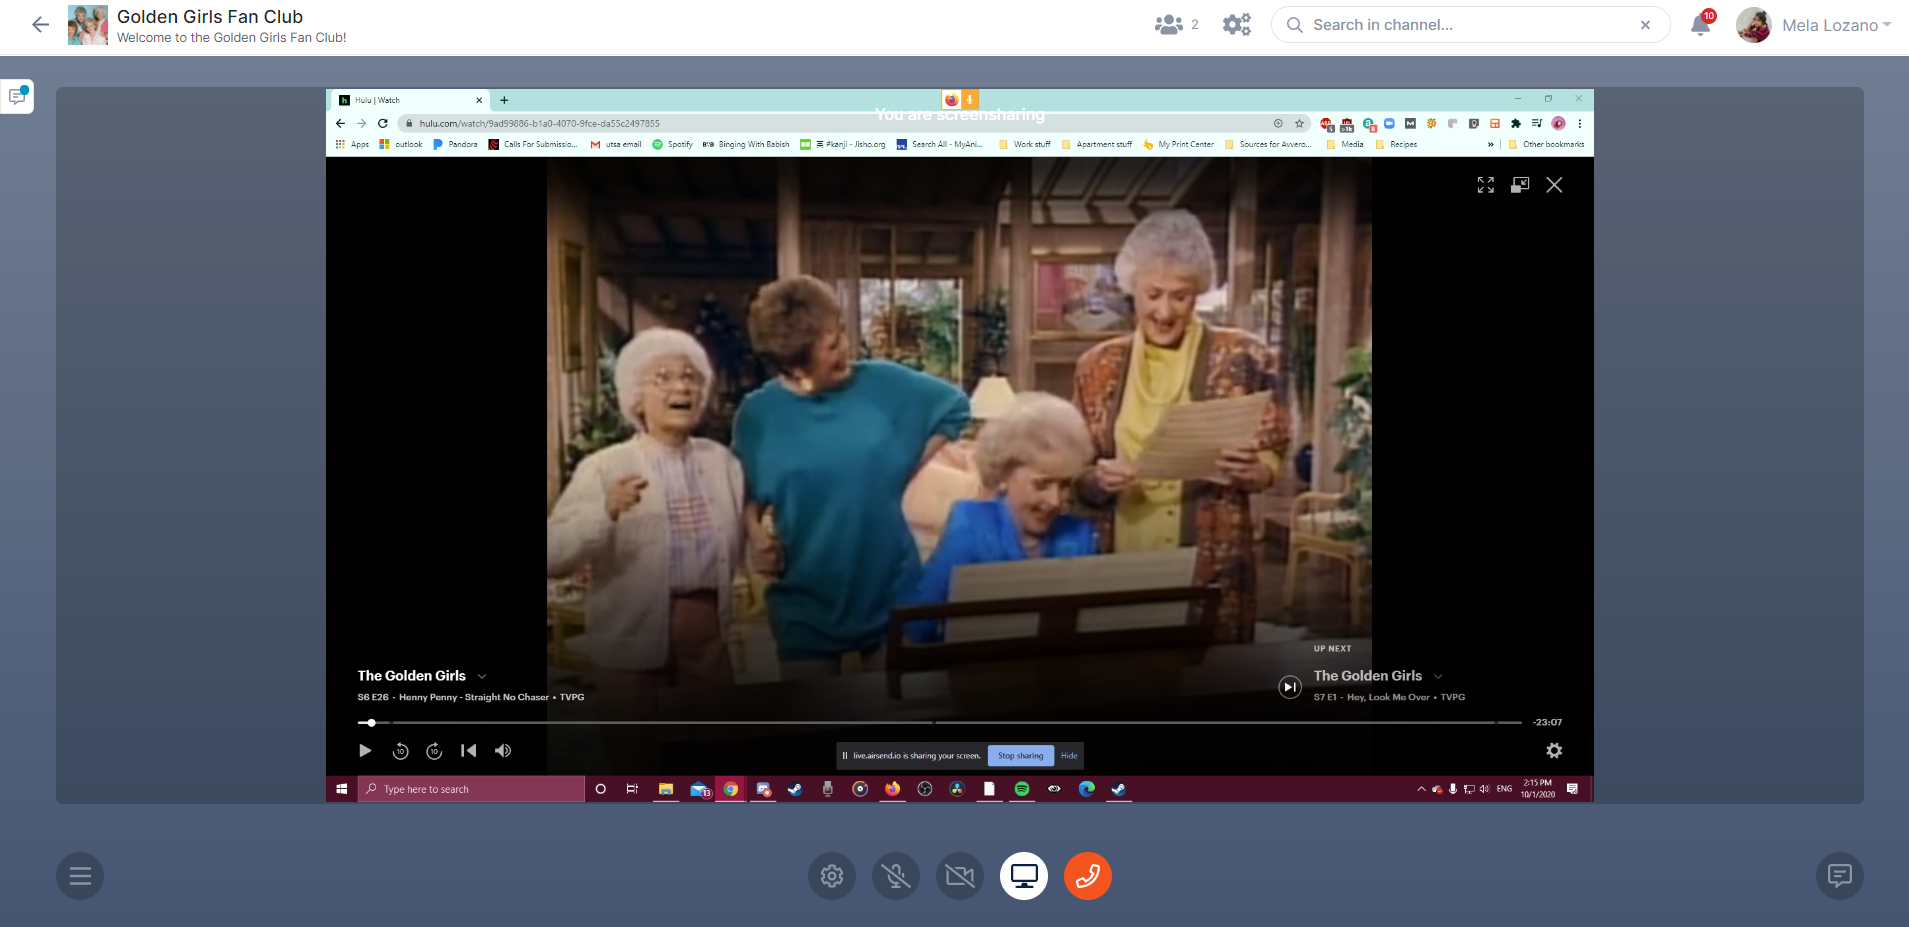
My favorite feature of AirSend’s voice and video call is the built-in chat. Because AirSend voice and video calls are built into the platform, it is easy to host meetings while also chatting in other channels- which is fantastic for multitasking. While chatting, you will have a grey bar located at the top with all your calling features, so you can talk in a meeting while messaging potential partners/clients. Think of these two features as a two-in-one combo.
Below is the full video of how to make audio and video calls with AirSend.